Subaru Outback (BR): Inserting a disc in a desired position

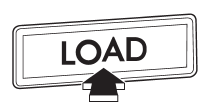
1. Briefly press the “LOAD” button. If the magazine in the player has an idle
position where you can insert a disc, the disc number indicator associated with
the idle position will blink.
The positions in the magazine the indicator of which steadily lights up are already
loaded with discs.

Disc select buttons
2. Press the disc select button at the position where you want to insert a disc.
3. When the “LOAD” indicator illuminates, insert the disc. Once you have inserted
the disc, the “LOAD” indicator will turn off. The disc will then be automatically
drawn in, and the player will begin to play the first track on the disc.
● If you wish to insert another disc, repeat the procedure beginning with step
1.
● If you do not insert any disc in 15 seconds after you have pressed the “LOAD”
button, the player will return to the original mode that was selected before the
“LOAD” button was pressed.
● While the player is in the loading mode, if you press “FM”, “AM” or “SAT” button,
the player will enter standby mode. Press the “CD/AUX” button to start playback.
READ NEXT:
1. If you continue to press the “LOAD” button for more than 1.5 seconds, the
player will produce beep sound and will enter the full disc loading mode.
2. When the disc number indicator flashe
NOTE
For type A audio, if a disc that the player cannot read has been loaded, the
player will display the message “CHECK DISC”.
Insert a CD by referring to “How to insert a CD (type A)” F5-19 / “How to insert
a CD (s) (type B)” F5-19.
When a CD is loaded, the player will start playback of the CD, beginning with
th
SEE MORE:
Foreword
HOW TO USE THIS MANUALS
1. STRUCTURE
Each section consists of SCT that are broken down into SC that are divided into sections for each component.
The specification, maintenance and other information for the components are included, and the diagnostic information has also been added where ne
A: REMOVAL
1) Lift up the vehicle, and then remove the front wheels.
2) Remove the front arm.
Remove the nut and disconnect the front stabilizer link.
Remove the bolt, and then remove the ball joint for the front arm.
Remove the bolts, then remove the front arm.
B: INSTALLATION
1) Before i
© 2010-2025 Copyright www.suoutback.com


