Subaru Outback (BR): Side Airbag Module
A: REMOVAL
CAUTION: Refer to "CAUTION" of "General Description" before handling the airbag module. <Ref. to AB-9, CAUTION, General Description.>
NOTE: Remove the passenger's side by referring to driver's side.
1) Remove the headrest.
NOTE: For models with headrest monitor, remove the headrest in the following procedures.
1. Fold the backrest all the way backward, and then remove the headrest.
2. Place the headrest on the seating face.
3. Return the backrest to the original position.
2) Disconnect the ground cable from battery and wait for at least 60 seconds before starting work.
NOTE: For the power seat, remove the slide rail installing bolt before removing the battery ground.
3) Remove the front seats.
- Remove the slide rail installing bolt.
- Tilt the backrest forward and move the seat to the front most position.
- Remove the rear bolt cover (A) and remove the two bolts.
- Move the seat to the rearmost position.
- Remove the front bolt cover (B) and remove the two bolts.
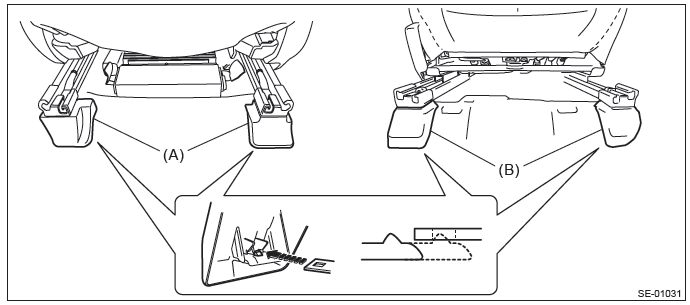
- Disconnect the connector under the seat.
CAUTION: Disconnect the ground cable from battery, and wait 60 seconds before disconnecting the connector.
- Seat belt warning light connector (driver's seat)
- Occupant detection system harness connector (passenger's seat)
- Side airbag connector
- Seat heater connector (model with seat heater)
- Power seat connector (model with power seats)
- Headrest monitor connector (model with headrest monitor)
- Take out the front seat from the vehicle.
CAUTION: Be careful not to damage the body.
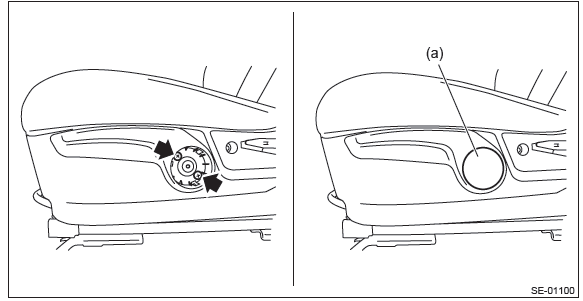
4) Remove the seat lifter lever. (Manual seat)
- Using a flat tip screwdriver, remove the seat lifter lever cover (a).
- Remove the screw and remove the seat lifter lever.
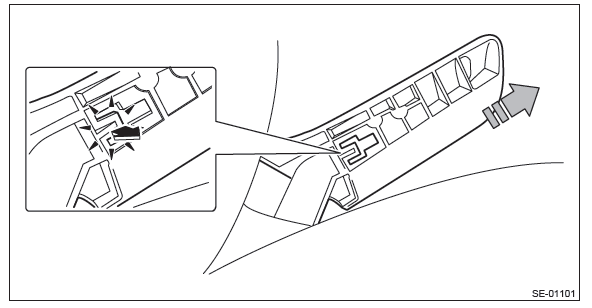
5) Remove the reclining lever cover. (Manual seat)
- Pull up the reclining lever and release the claws on the back.
- Pull out the reclining lever cover.
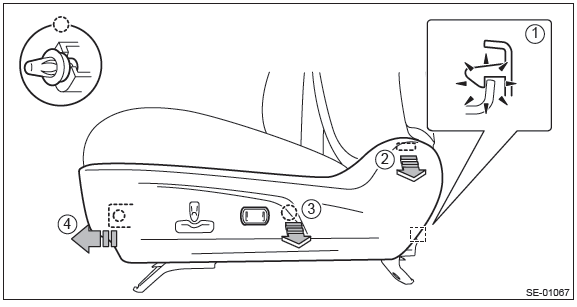
6) Remove the seat side cover OUT.
- MANUAL SEAT
- Remove the screws.
- Release the claw in the upper section of the seat side cover.
- Release the claw in the rear section of the seat side cover.
- Release the claw in the front section of the seat side cover, then remove the seat side cover OUT.
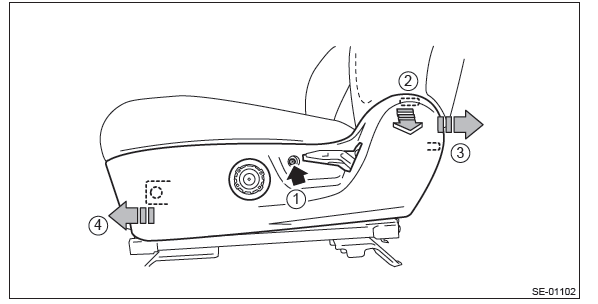
- POWER SEAT
- Release the claw in the rear section of the seat side cover.
- Release the claw in the upper section of the seat side cover.
- Remove the clip and release the claw in the front section of the seat side cover
- Disconnect the power seat switch connector and remove the seat side cover OUT.
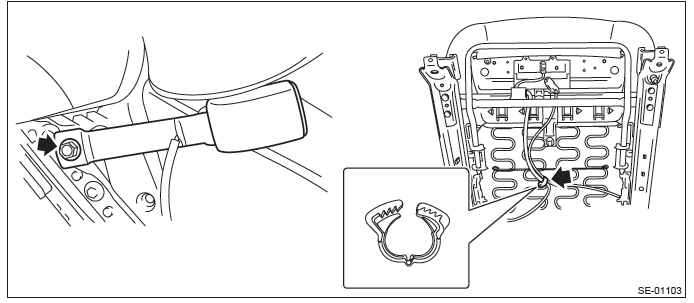
7) Remove the inner seat belt assembly.
- Remove the nut and remove the inner seat belt assembly.
- Remove the clip for the inner seat belt harness located under the seat cushion.
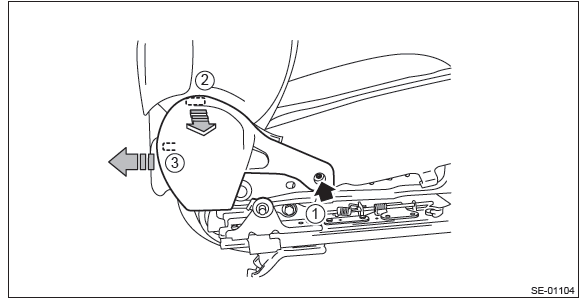
8) Remove the seat side cover IN.
- MANUAL SEAT
- Remove the screws.
- Release the claw in the upper section of the seat side cover.
- Release the claw in the rear section of the seat side cover, then remove the seat side cover IN.
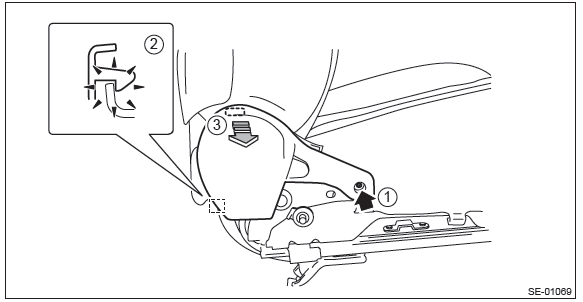
- POWER SEAT
- Remove the screws.
- Release the claw in the rear section of the seat side cover.
- Release the claw in the upper section of the seat side cover, then remove the seat side cover IN.
9) Separate the backrest assembly and the seat cushion assembly.
- Remove the clip for the side airbag harness located under the seat cushion.
- Remove the bolts from reclining hinge of both sides.
- While taking care not to damage the airbag harness, separate the backrest assembly and the seat cushion assembly.
- MANUAL SEAT
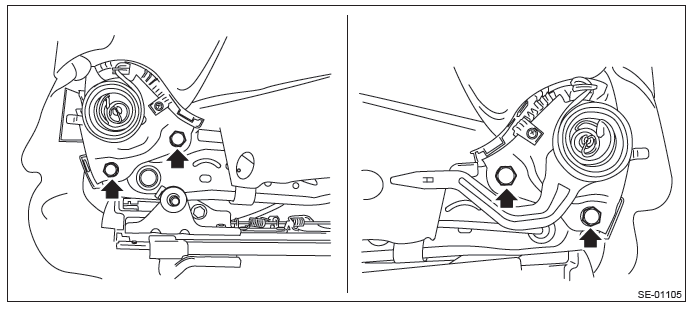
- POWER SEAT
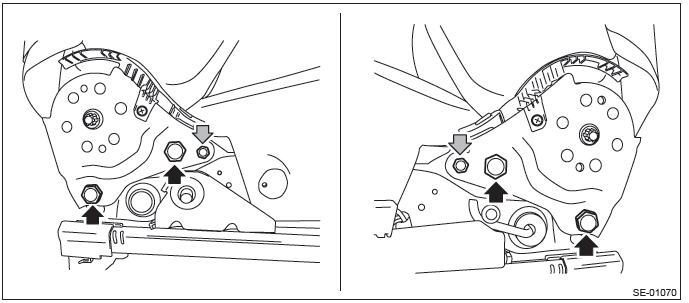
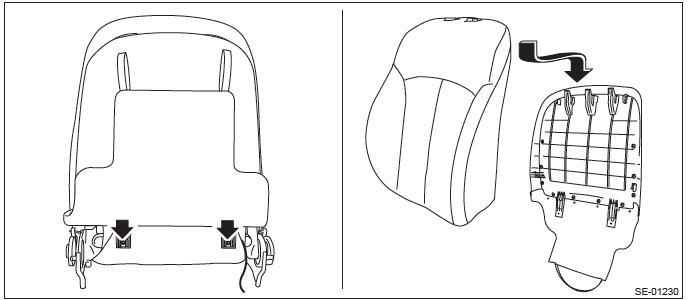
10) Remove the backrest back cover.
- Remove the screws.
- Release the hooks by pulling down the back cover and remove the backrest back cover.
11) Remove the side airbag module assembly.
CAUTION:
- Be careful not to tear the vinyl inside the seat when removing the
hog rings.
If torn, replace with a new part.
- Do not open the (plastic) protective cover of the airbag. If any damage is present in the protective cover (such as airbag module cloth coming out), replace the side airbag module assembly with a new one.
- Remove the hooks and hog rings.
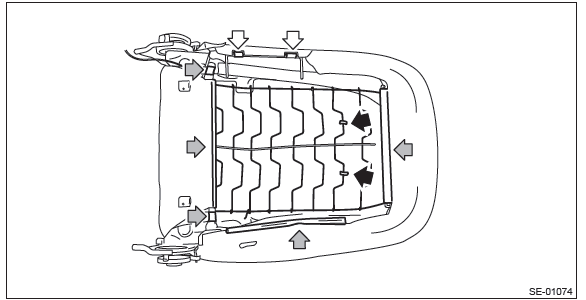
- Remove the backrest pad & cover from backrest assembly.
- Remove the mounting nuts of the side airbag module.
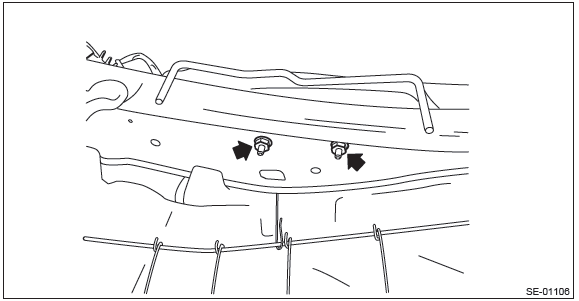
- Remove the side airbag harness from backrest frame assembly.
- While taking care not to damage the airbag (plastic) protective cover, remove the side airbag module assembly.
B: INSTALLATION
CAUTION:
- Refer to "CAUTION" of "General Description" before handling the airbag module. <Ref. to AB-9, CAUTION, General Description.>
- Be sure to perform the system calibration for occupant detection
system after passenger's seat installation.
<Ref. to OD(diag)-15, OPERATION, System Calibration (Rezeroing).>
- Make sure that the side airbag module assembly is installed as shown in the figure.
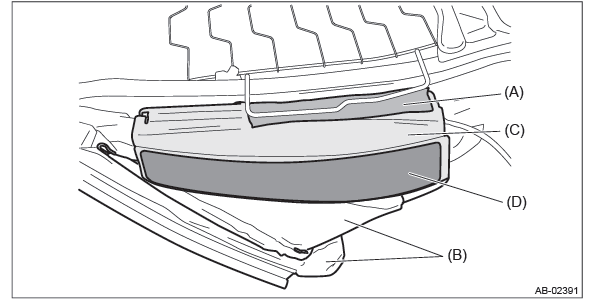
- Side airbag guide cloth
- Backrest cover
- Side airbag module ASSY
- Side airbag tape
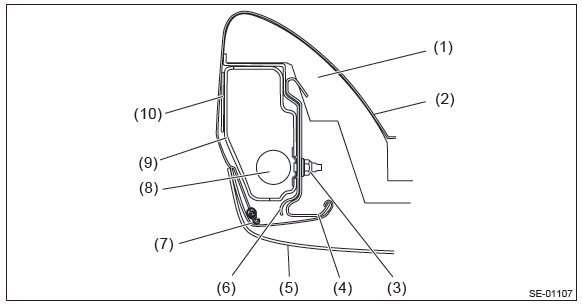
- Backrest pad
- Backrest cover
- Nut
- Backrest frame
- Backrest back cover
- Side airbag guide cloth
- S hook
- Side airbag module inflator
- Side airbag module case
- Side airbag tape
- When replacing the side airbag assembly with new one, be sure to attach the side airbag tape.
- Be careful not to stain or damage the backrest cover during assembly.
- Do not reuse hog rings and S hooks.
- Secure the hog ring using hog ring pliers.
- Install the hog rings to the specified points securely and make sure that no wrinkle or twisting on backrest cover.
1) Before installation, inspect the following items and replace any faulty part with a new one.
- Make sure that there is no foreign matter on side airbag module.
- Front seat, airbag module and mounting bracket are damaged or deformed.
- Harness and/or connector is cracked, deformed or open.
- Harness wire is exposed.
2) Install the side airbag module to the backrest frame assembly.
Tightening torque: 6 N*m (0.61 kgf-m, 4.4 ft-lb)
3) Install the side airbag harness to backrest frame assembly.
4) Install the backrest cover.
5) Secure the backrest hinge.
- MANUAL SEAT
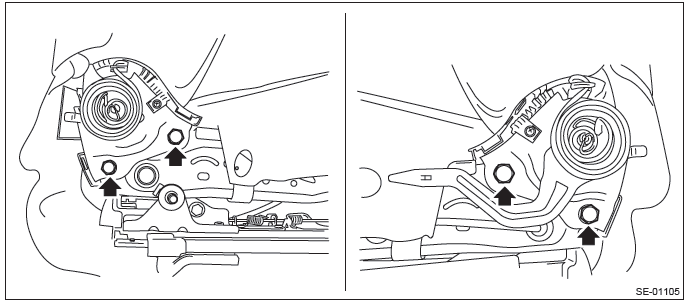
- POWER SEAT
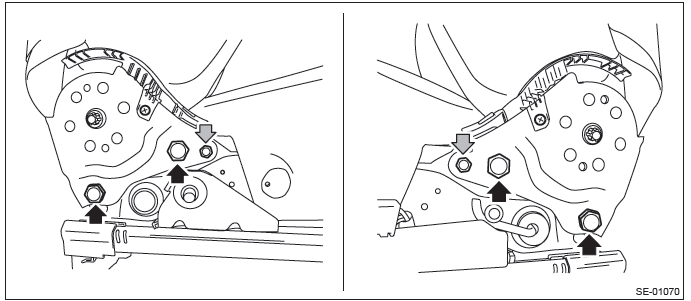
Tightening torque:
Refer to "COMPONENT" of "General Description". <Ref. to SE-2, FRONT SEAT,
COMPONENT,
General Description.>
6) Install the side airbag harness to the back of the seat cushion assembly using a cable clip.
CAUTION: After restoring the seat, operate the reclining and sliding mechanisms to check that the side airbag harness is not caught.
7) Install the front seat to the body.
CAUTION:
- The seat mounting bolts differ between the front mounting points and
the rear mounting points.
Make sure that you are using correct bolts at correct positions.
- Tighten the slide rail installing bolt gradually in several steps to the specified torque in the order as shown in the figure.
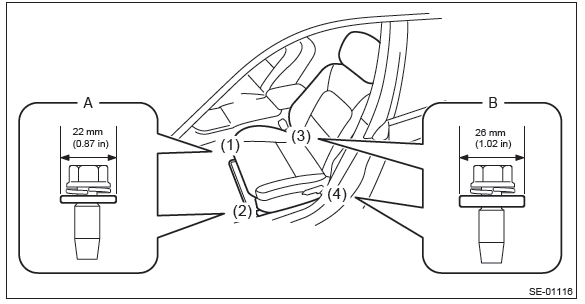
- Front (bolt A): Washer diameter 22 mm (0.87 in)
- Rear (bolt B): Washer diameter 26 mm (1.02 in)
Tightening torque:
Front seat assembly: 53 N*m (5.4 kgf-m, 39.1 ft-lb)

