Subaru Outback (BR): Upper Inner Trim
A: REMOVAL
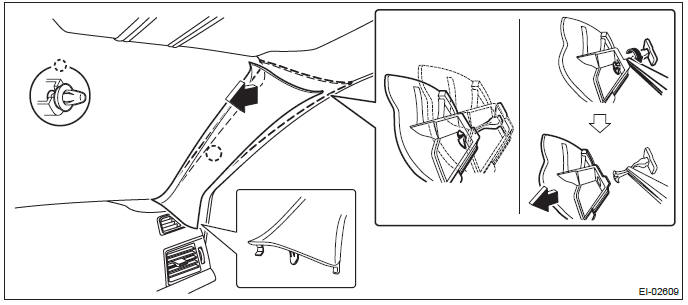
1) Remove the front pillar trim.
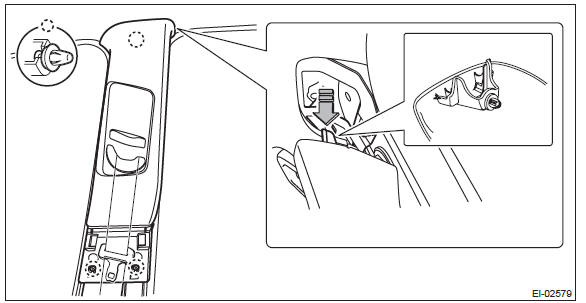
- Pull the upper part of the front pillar trim towards the center of the vehicle.
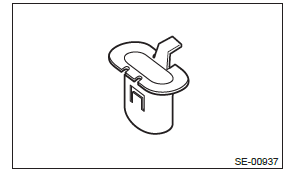
- Insert long-nose pliers into the top part of the trim, grip the clip with the pliers and twist 90º in that position.
CAUTION: Be careful not to damage the pillar trim surface and curtain airbag module when inserting the pliers.
- Holding the clip twisted as in the previous step, remove the front pillar trim from the clip.
- Remove the clip and the front pillar trim.
2) Release the claws, and then remove the side sill cover-front INN.
CAUTION: Do not pull with excessive force. Doing so may damage the claws of the side sill cover INN.
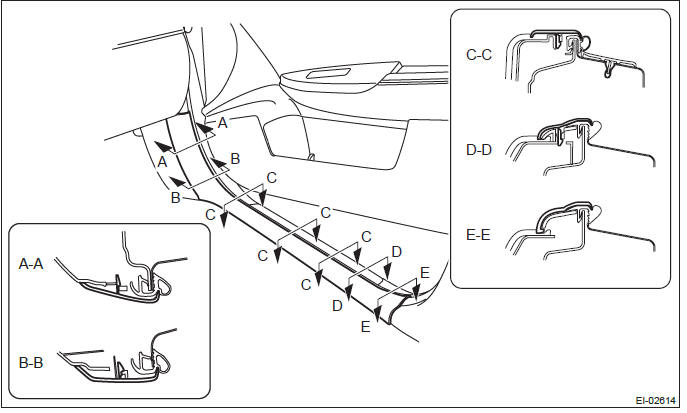
NOTE: To release the claws of the side sill cover INN, the following steps are recommended.
1. Take out the weather strip from under the side sill cover INN.
2. Turn over the floor mat and release the claw (C-C) by accessing from behind the side sill cover INN.
3) Remove the rear seat cushion assembly.
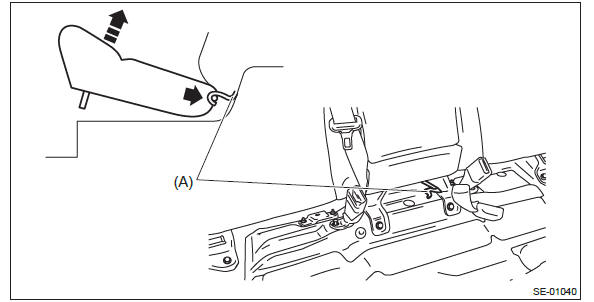
- Pull up the seat cushion and release the hook.
CAUTION: If the hook is disconnected from the vehicle body, replace the hook with the new part to prevent the decline of the fixed force of the seat.
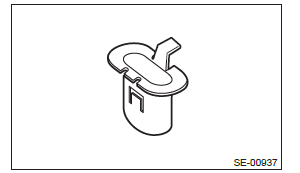
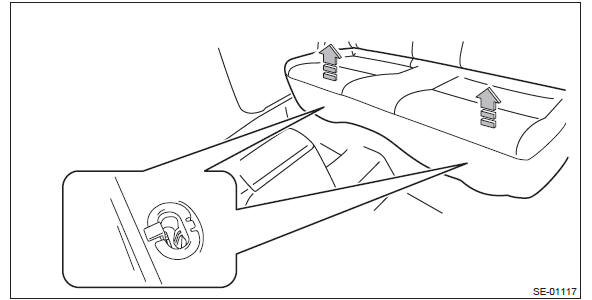
- Remove the hook (A) by pushing it back while lifting the front side of the seat cushion, and remove the seat cushion.
4) Release the clips and claws, and then remove the side sill cover - rear INN.
CAUTION: Do not pull with excessive force. Doing so may damage the claws of the side sill cover INN.
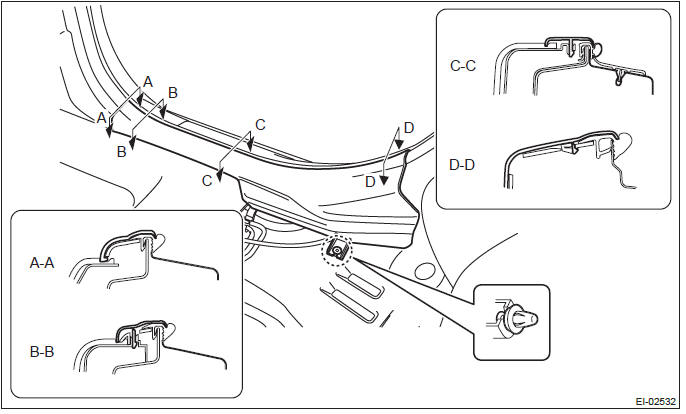
NOTE: To release the claws of the side sill cover INN, the following steps are recommended.
1. Take out the weather strip from under the side sill cover INN.
2. Turn over the floor mat and release the claw (C-C and D-D) by accessing from behind the side sill cover INN.
5) Remove the center pillar trim LWR.
- Release the clip by pulling the center pillar trim LWR toward you.
- Expand the claws of center pillar trim LWR outward and remove it from the center pillar trim UPR.
CAUTION: Do not expand the center pillar trim LWR excessively. Doing so may damage the trim.
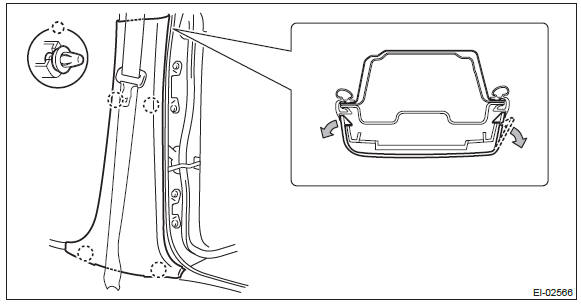
NOTE: First release the claw located to the rear of the vehicle.
6) Remove the center pillar trim UPR.
- Remove the seat belt lower anchor bolt.
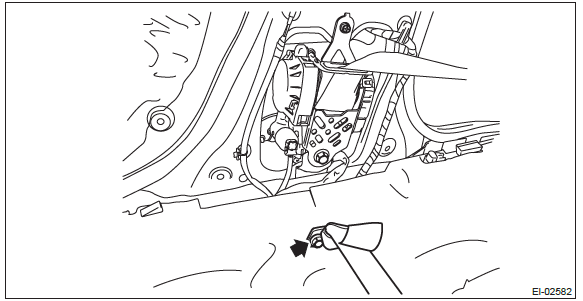
- Release the clip by pulling the center pillar trim UPR toward you.
- Remove the center pillar trim UPR by lowering the entire trim.
- Pull out the seat belt and remove the center pillar trim UPR.
B: INSTALLATION
CAUTION:
- Do not reuse the clips in the upper section of the front pillar trim.
Always replace them with new
ones.
Once removed from the pillar trim, the clip retention power deteriorates and the front pillar trim may come off.
- Do not reuse the clips in the upper section of the center pillar
trim. Always replace them with new
ones.
Once the pillar trim is removed, the clip retention power deteriorates and the center pillar trim may come off.
- Before installing the front pillar trim, check the condition of (white) protective unwoven cloth of curtain airbag. If it is damaged (airbag module cloth is exposed), replace the curtain airbag module assembly with a new part.
1) Remove any clips remaining on body.
2) Prepare new clips and attach them to the front pillar trim.
3) Install the front pillar trim.
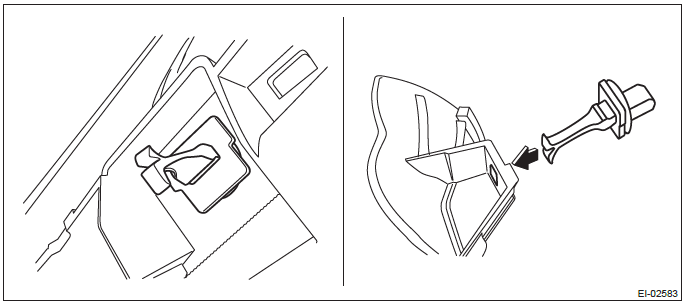
4) Assemble the center pillar trim LWR to the center pillar trim UPR securely.
CAUTION: Do not forget to install the seat belt.
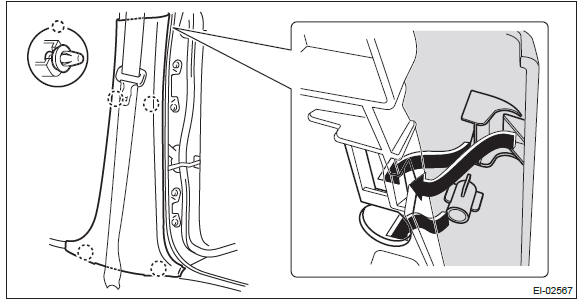
5) Assemble the center pillar trim LWR and center pillar trim UPR to the body.
CAUTION: Do not reuse the clips in the upper section of the pillar trim. Always replace them with new ones.
- Guide the seat belt through the center pillar trim UPR.
- Insert the upper claws of the pillar trim.
- Attach the pillar trim by fitting the lower clips to the body.
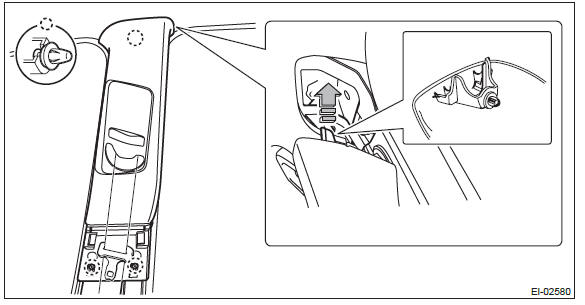
6) Install each part in the reverse order of removal.
CAUTION: If the hook is removed from vehicle body, replace the hook with the new part to avoid the deterioration of seat securing.
Tightening torque Front seat belt: <Ref. to SB-2, FRONT SEAT BELT, COMPONENT, General Description.>

