Subaru Outback (BR): Center Console
A: REMOVAL
1. CENTER PANEL ASSY
1) Attach the protective tape (a) to the meter visor.
2) Remove the center panel assembly.
CAUTION: Do not put your finger on the fin of the air vent grille. Doing so may damage the fin.
- Attach the protective tape (a) to the meter visor.
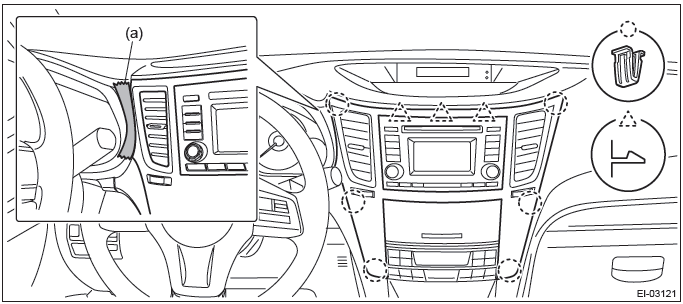
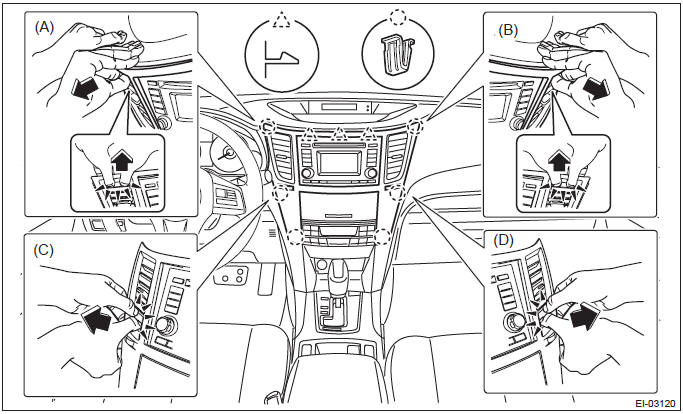
- Insert a finger into the air vent grille and release the left and right
clips at the top of the center panel.
(A), (B)
- Insert a finger into the air vent grille and release the left and right
clips at the center of the center panel.
(C), (D)
- Release the clips at the bottom of the center panel and remove the center panel assembly.
2. CONSOLE FRONT COVER
MT model
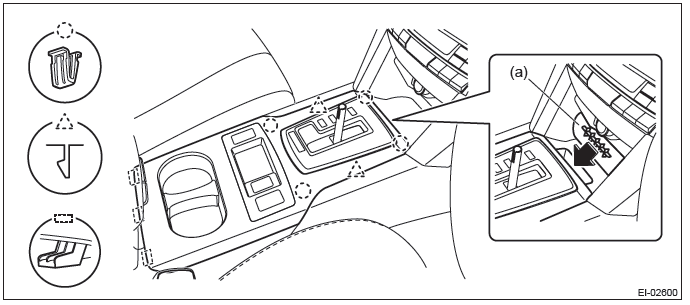
1) Remove the console front cover assembly.
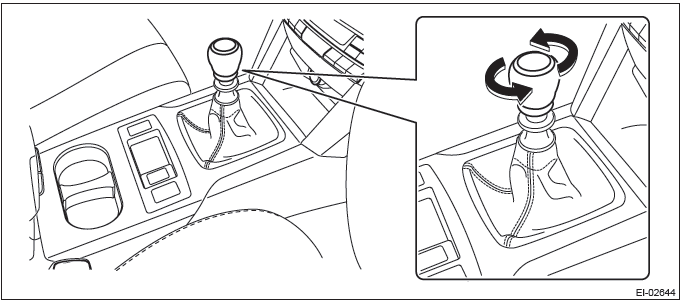
- Remove the shift knob.
- Release the clips and claws, then pull up the console front cover assembly.
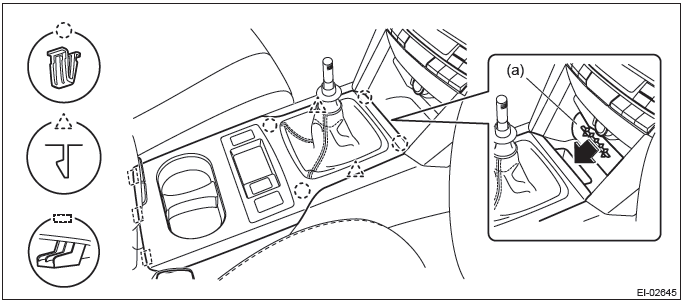
NOTE: Turn over the front center pocket mat (a) and pull up the console front cover from the slit.
- Disconnect the harness connector and remove the console front cover assembly.
AT model
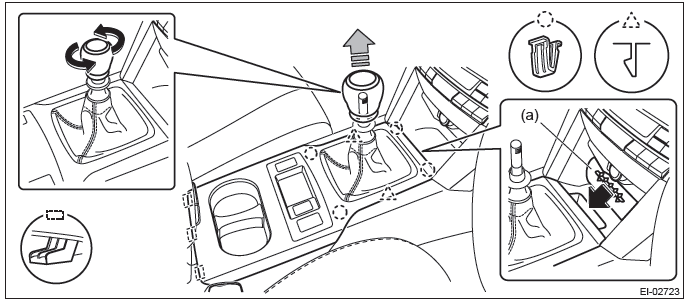
1) Remove the console front cover assembly.
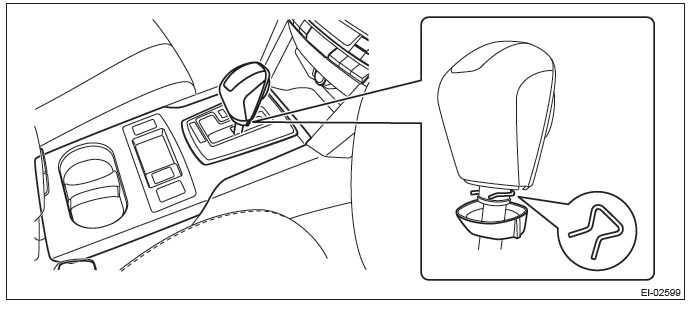
- Remove the select lever knob.
- Lower the cover grip AT.
- Remove the clamp grip pin, then remove the select lever knob.
- Release the clips and claws, then pull up the console front cover assembly.
NOTE: Turn over the front center pocket mat (a) and pull up the console front cover from the slit.
- Disconnect the harness connector and remove the console front cover assembly.
B: INSTALLATION
Install each part in the reverse order of removal.
Console Box
A: REMOVAL
1) Remove the console front cover assembly.
- MT model
1. Remove the shift knob.
2. Release the clips and claws, then pull up the console front cover assembly.
NOTE: Turn over the front center pocket mat (a) and pull up the console front cover from the slit.
3. Disconnect the harness connector and remove the console front cover assembly.
- AT model
1. Remove the select lever knob.
- Lower the cover grip AT.
- Remove the clamp grip pin, then remove the select lever knob.
2. Release the clips and claws, then pull up the console front cover assembly.

NOTE: Turn over the front center pocket mat (a) and pull up the console front cover from the slit.
3. Disconnect the harness connector and remove the console front cover assembly.
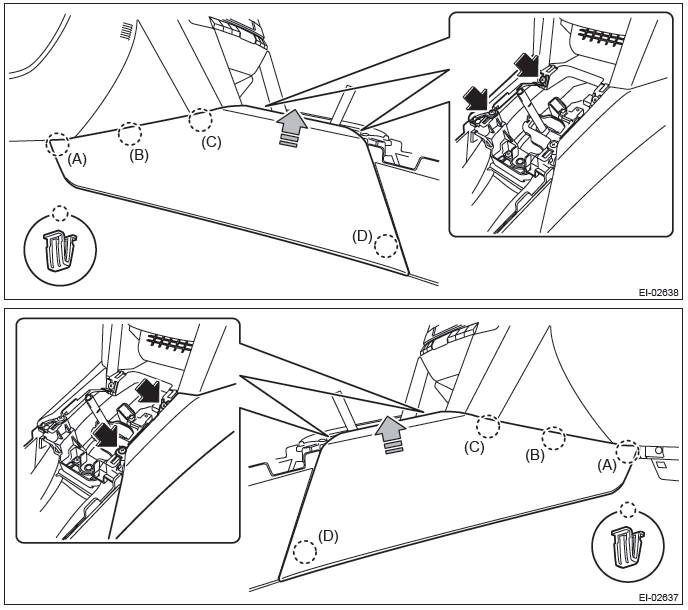
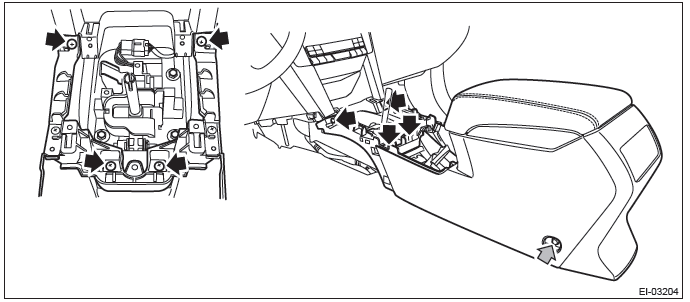
2) Remove the left and right console front side cover assembly.
- Remove the screws and release the clip engagings (A) to (D) in order.
- Remove the console front side cover assembly by pulling it up.
3) Remove the console box assembly.
- Move the seat forward, and remove the bolts after detaching the left and right caps.
NOTE: For a model with power seat, connect the battery ground cable and move the seat. Then, disconnect the battery ground cable again and wait for 60 seconds at least before restarting the work.
- Remove the screws, disconnect the harness connector and remove the console box assembly.
B: INSTALLATION
Install each part in the reverse order of removal.
Tightening torque: 6.5 N*m (0.66 kgf-m, 4.8 ft-lb)
READ NEXT:
 Instrument Panel Assembly
A: REMOVAL
CAUTION:
Be careful not to damage the airbag system harness when servicing the instrument
panel. Damage
may cause the system to malfunction.
1) Disconnect the ground cable from battery.
2
Lower Inner Trim
A: REMOVAL
1) Release the claws, and then remove the side sill cover-front INN.
CAUTION:
Do not pull with excessive force. Doing so may damage the claws of the side sill
cover INN.
NOTE:
To release
Upper Inner Trim
A: REMOVAL
1) Remove the front pillar trim.
Pull the upper part of the front pillar trim towards the center of the
vehicle.
Insert long-nose pliers into the top part of the trim, grip the clip
SEE MORE:
Scalp Cap
A: REPLACEMENT
1. MODEL WITHOUT ELECTRIC RETRACTABLE MIRROR
CAUTION:
When removing the mirror, be careful not to damage the back surface
of mirror with a flat tip screwdriver.
When installing the mirror, insert the connector and clip securely.
1) Operate the remote control mirror switch to fac
Rear Quarter Trim
A: REMOVAL
1. SEDAN MODEL
1) Disconnect the ground cable from battery and wait for at least 60 seconds
before starting work.
CAUTION:
The airbag system is fitted with a backup power supply. After disconnecting the
battery ground cable,
the airbag may operate if you do not wait for 60 seconds befor
